I can't believe it is almost Valentine's Day! Last week flew by as we worked at my husbands office doing some updating. It turned out great but was a lot of work! I meant to share these easy valentine standing hearts but didn't quite have time until now.
These are super easy and are just fun to add a little something to your Valentine's Decor. Here's a quick tutorial. Supplies: Hearts on stick (found at Hobby Lobby) Square wood bases (also found at HL) ribbons and raffia scrapbook paper modge podge sandpaper and paint brush paint
First trace your hearts onto selected scrapbook paper.
Next, paint your block and hearts.
Drill hole in base of block to attach heart on stick. (I just used a drill)
After paint is dry, adhere scrapbook paper to face of heart using modge podge.
After it dries, you can coat it with modge podge over the paper if you like. After its all dry, you can sand the edges to make sure the paper is a perfect fit with a clean edge.
Next, using hot glue, attach the stick into the hole you drilled to put it all together.
Add any embellishment you like and ribbon trim and there you have an easy cute addition to your Valentines Decor.
Want updates and spoilers on projects and ideas? Come like me on facebook and twitter to keep up on whats up next! Looking for other Valentine's Ideas and Free Printables? Go Here!
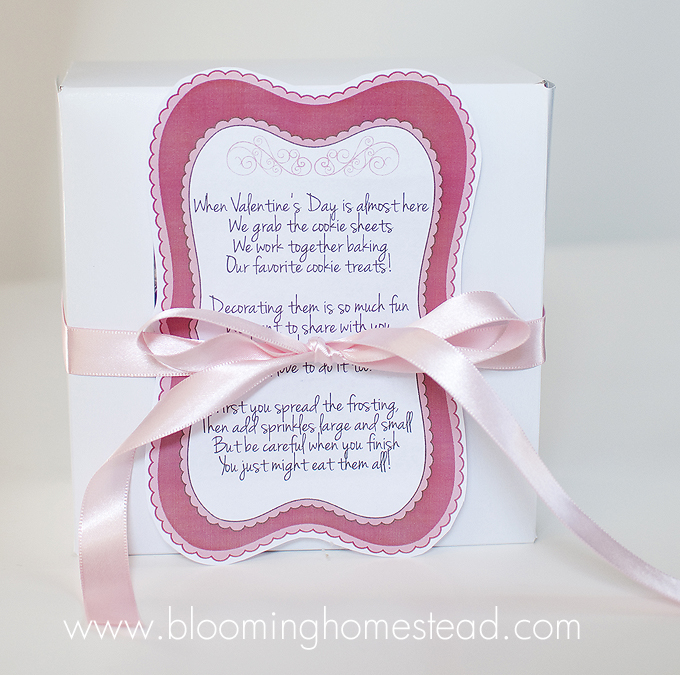
Hey Everyone, I am postponing my "what I'm lovin" friday series this week to share this fun Valentines Printable Poem and gift idea.
I shared this printable on Skip to My Lou last week and thought I would share it here as well in case you missed it. I came up with this idea and knew I had to share! Who wouldn't love to receive this "cookie kit". Almost everyone I know loves sugar cookies...but not the work involved to make them. That's where you come in!
I made the cookies and tied them with twine. I also made frosting and put it into cute little jars. Next, take some sprinkles and put them in these easy clear containers. (I bought them at walmart...we keep them on hand for sauces and sides in school lunches. :)
Print and cut out the poem.
Stuff your gift box with cute themed tissue paper and add your cookies and decorating supplies!
Wrap with ribbon and you've got yourself a gift that anyone would love to receive this Valentine's Day!
Click here to download the poem. Looking for more Valentine's Ideas and Free printables? Go Here!
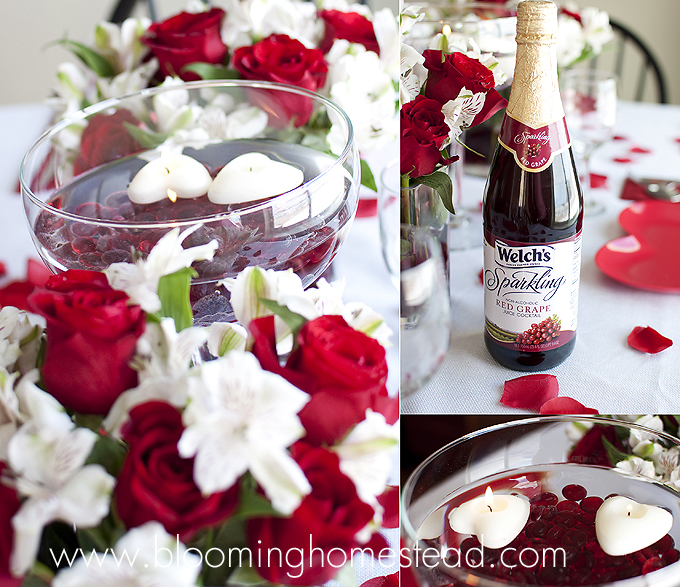
Every Valentine's Day we have a tradition of having a fun family "Valentine's" candlelight dinner. It is a fun excuse to have a special themed night family dinner and enjoy the memories we are making.
I love all the little details. Can't forget the sparkling grape juice!
Floating candles, rose petals, heart shaped plates...just so fun.
Are you planning anything special this Valentine's Day?
Since I have lots of new followers, I thought I would share some of my valentine crafts, recipes, and printables posts that you may have missed from years past- I have a few more fun valentine posts to share this week so stay tuned!
More fun Valentine's Ideas coming up this week(decor & printables)!
Also...to answer a few questions- The white frame with the hearts is from TJ Maxx...I got it years ago but have seen similar ones around here and there. Also, the LOVE blocks you see I bought as a kit about 4 or 5 years ago and they are no longer offered but I am going to make some new similar ones (for St. Patty's) to show you the process!
Want updates and spoilers on projects and ideas? Come like me on facebook and twitter to keep up on whats up next!
I wanted a pop of color for my shutters and while browsing hobby lobby I found the most perfect roses. They are full, a beautiful shade of red, and are made of a velvety material which makes them look a little more real. They were the most expensive single stem roses they had but well worth it. (just hit the 50% week!)
First pop the roses off the stem but be sure to keep them attached to the bottom green bud part otherwise they will fall apart.
This is what happens if you don't get the green stem bud part...
Next, grab you hot glue gun and start gluing them into the wood wreath base.
I decided I wanted to make something new to add to my valentines vignette but I wanted something easy and quick! As I was browsing hobby lobby I came across this wood heart and thought it would be fun to make a wood plaque. Here are my supplies (minus the glue I used to attach the medallion on the heart).
First off, I watered down some white craft paint and whitewashed my heart. I want it to look similar to the shutters I made with the wood grain showing through.
While that dried, I took some white and red paint and mixed it to make a nice pink. I painted the medallion and then went over it with a dark color and wiped it off so it just stayed in the shadows.
After they were both dried, just use a little glue(I used liquid nails) and stick the medallion on center. There you have it! This could be cute in a frame, or hanging from ribbon. I am just using a picture stand, but I think I need to paint it. The black seems too harsh. I will post my full valentine vignette soon!
I made this last year and I got so many comments and emails about it. As I mentioned, I found these little hearts at hobby lobby, and I went there last week and they have them again this year! They are in a little clear box and in the valentine isle. Just wanted to give you a heads up in case you were still interested!
I'm such a slacker, I meant to post these before now! Better late than never right? I also meant to have some bottle wrappers and big labels as well, but haven't had the time. Anyways, here are some valentine tags. I use a 2" scallop punch as my go to favorite.
Go here to download this pdf. Print these on heavy Bright White cardstock for the best look. As always, personal use only. :)
These are just the cutest Homemade Valentines and I am here to share an easy tutorial so you can make them. These make a great Kids Valentine Craft as well.
Yesterday we made some cute homemade valentines. I made something like these years ago with friends and we took them to the local children's hospital. We called ahead to make sure it was okay and we used stickers in place of candy for those who had dietary restrictions. It was fun and fulfilling!
First I printed out a heart because I cannot freehand. Then I traced it on colored cardstock. I also traced the heart on this lace vinyl pictured below.
This is lace vinyl I found at Joanns. It's pretty affordable and adds a little something extra to the valentine. In the past I used white cardstock for the back and hot pink vinyl for the front, but they told me they no longer carry the pink vinyl so I went with this.
Cut it out and hole punch so that you can thread ribbon through the holes.
Thread Ribbon through, I used a few different methods for this. I did a few in and out like what is pictured, and a few wrapped over and back through around the edges (see final pic for example).
Before you completely close off you heart, add a few piece of candy(I used hugs and kisses cause that is what I had but something flatter might work easier!) or stickers or whatever inside and then close them up. I tied the loose ends together in a big bow at the top of the heart. Now you can write love notes on the back and you're good to go. Super easy and affordable. Aren't they just the most adorable homemade valentines?
Want updates and spoilers on projects and ideas? Come like me on facebook ,twitter, and Google + to keep up on whats up next!