Friday, April 29, 2011
May Calendar Printable
Tuesday, April 12, 2011
Baby Burp Cloths
I use cloth diapers because I just think they make the best burp cloths, seriously you gotta try them. Only problem is they aren't the cutest. Nothing that a little fabric, ribbon, and trim won't fix! (FYI...I wash all my stuff except the ribbon and trim before I sew because things shrink after washing)
Burp Cloth #1: This one will be covered completely by fabric on one side. Start out by laying out on cutting mat. Cover with burp cloth.
Using a rotary cuttery cutter or scissors cut out fabric around burp cloth with 1"of fabric overhand to fold over for seams. Make sure to leave about 1" edge around burp cloth of excess fabric or you won't be able to hide your seams and prevent fraying.
I then took fabric and burp cloth and folded fabric around the cloth and ironed it down to create the shape I would need.
This is how I do my corners. Kind of a triangular fold?
After you have ironed all around several times, remove burp cloth and you should have a good ironed out guide of your fabric.
Place burp cloth on top of fabric and make sure it is straight so you can pin it together. If you can't get it straight, go back and iron it down to the correct shape. If you get it even before you sew then your burp cloth with look better and more even.
Sew fabric to burp cloth, (I used about 1/4" seam allowance) by going around the entire cloth. Make sure when you begin and end you go in reverse a little to secure your stitching better.
Burp Cloth #2:This burp cloth I used a similar technique to the other one, excep this time I decided to just cover the ends of the burp cloth (both inside and out). I layed out my fabric, set my burp cloth on top and then folded the fabric over to see how much edging I wanted. Then I carefully removed the burp cloth and cut out my edging strips.
I decided to clean up the seams and prevent fraying so I sewed down the edge using just a tiny seam allowance. Just enough to gather it under.
I took the fabric strip and folded it evenly around the bottom (or top) edge of the cloth diaper. I made it as even as I could using the sides as my guides. I then folded over the edges and tucked them under and ironed them down so they would be a clean edge when I sewed.
I pinned the fabric to the cloth diaper. I cannot get straight edges unless I pin, otherwise the fabric or cloth moves too much and just a little can totally mess up your seam!
Sew your fabric to your cloth diaper. (I used roughly a 1/4" seam allowance and ran along all edges). Time to make it a little bit cuter with ribbon. I forgot to take a pic of this, but I measured a piece of ribbon that would go along the edges where the fabric meets the cloth diaper on both ends, inside and out. I used iron on adhesive strips and attached them to the back of the ribbon. You can find this in the sewing isle by the notions. Just lay it down, iron it on, peel off the back and then its ready to be ironed on your project!
I ironed it around both ends of the burp cloth and I stitched over it for extra measure to make sure it was secure.
It turned out so cute!
Burp Cloth #3: This one is the easiest yet, I found this ruffle trim at hobby lobby. I just pinned it around the edges of the burp cloth and sewed it on! Sooo easy and sooo adorable!
Aren't they just so cute?
EDITED TO ADD: Here is a link to the free downloadable tags in blue and pink.
P.S. I'm out on vacation so I may not have access to email for questions or comments so please don't think I am ignoring you...just spending some time with family!
Bright Beginnings at Diapers.com
This post brought to you by PBM Products. All opinions are 100% mine.
Have you guys ever been to diapers.com? For most baby showers here we love to pool our money together and give gift certificates at the showers to new moms. I think it is such a fantastic gift for mom's to get exactly what they need at great prices and they don't even have to leave the comfort of their house!
And good news...Bright Beginnings Formula is now available to buy on diapers.com!Bright Beginnings offers a variety of FDA-regulated infant formulas that are nutritionally comparable to the big national brands - at prices that will fit your family's budget. When you look at the ingredients and nutritional facts for Bright Beginnings infant formula, you can see the similarity between Bright Beginnings and more expensive brands like Similac® and Enfamil®.They offer many varieties too including premium, gentle, organic, soy, and soy pediatric. Something to fit everyone's needs.
You can also check out Bright Beginnings on Facebook. "Like" their page, and you will find a code for 15% off of your bill.
Also, go here and get a 20% off code on diapers from diapers.com as well as an another code for 10% off everything else! Great deals you have to check out!
Monday, April 11, 2011
Anniversary Surprise
Oh well...at least its a night I will never forget. I have only attended 2 George concerts...but I hope that he'll keep touring so I can attend more. It was so amazing and I am even more impressed that my dh put so much thought into this. Especially because I know he would have rather spent the money somewhere else but he did it all for me. He "gets" me. The show was fantastic, minus the wasted middle age woman sitting near us. Of course she was pretty amusing to watch, even when she fell down the stairs...I know, I shouldn't have laughed, but if your going to get that trashed in public you should probably expect to get laughed at it. And she even got up and laughed :) Even the next day we woke up and laughed at the hangover she was going to have. :) The best anniversary EVER!
Wednesday, April 6, 2011
Fabric Flowers-Part 1 Rosettes
First off: Fabric Rosettes...my favorite. (I know...another rosette post) I made some at Halloween and used them as a brooch. So cute. I knew I needed something with gray and yellow to accessorize with some new shirts I bought. But I will tell ya...I am NOT a big hair accessory kind of gal. I like accessories, I just don't want a big giant flower on top of my head...sorry...its just not me. So keeping that in mind I knew I wanted to keep the rosettes thin and skinny so they weren't too high off my head. I already posted a rosette tutorial but I am going to post my process of making these skinny rosettes too. Keep in mind that I had to be a little neater to make sure the glue didn't glob through to front of the rosettes where it would be visible.
First off I cut a piece of felt for the base.
Then I cut my fabric strip. Usually I tear a strip of fabric because I like the look, however, I decided to cut strips 1 1/2" wide to keep it skinny and not as tall.
Fold rosette strip in half.
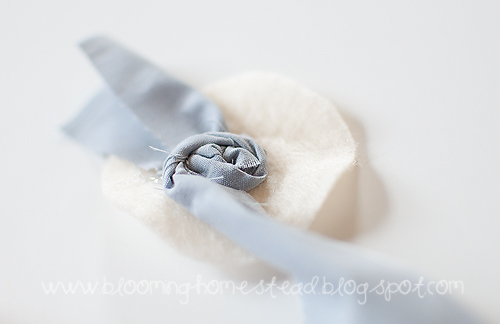
Tie knot in one end to create the starting center "bud".
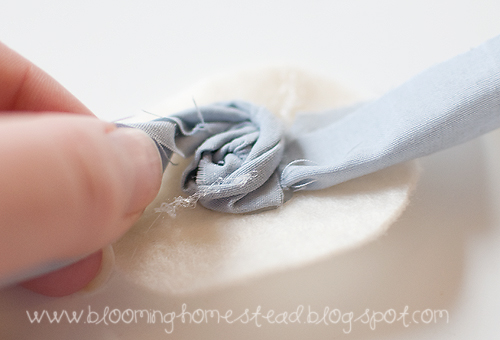
Then put a small amount of hot glue on the center of the felt and place the knot with end wrapped kind of under on the hot glue to secure it as a start. Then start wrapping and twisted the folded fabric around the bud to created your rosette.
Make sure you don't use too much glue so it doesn't seem through to the front. Keep wrapping and twisting as you go.
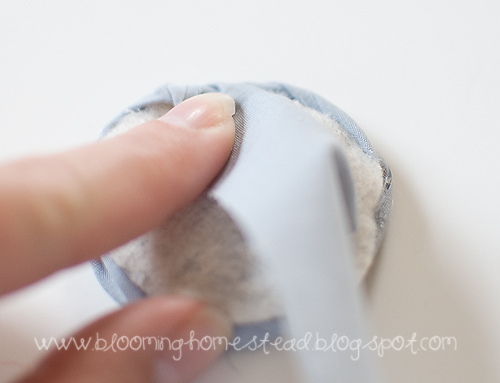
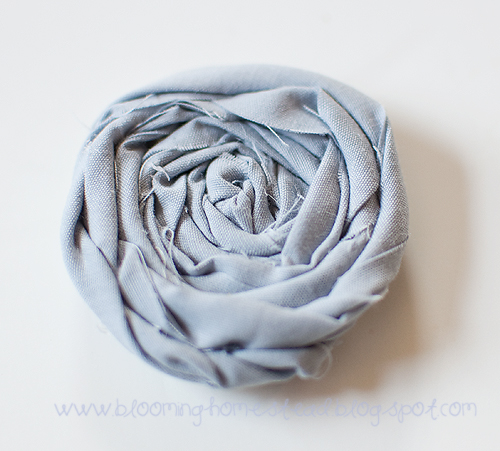
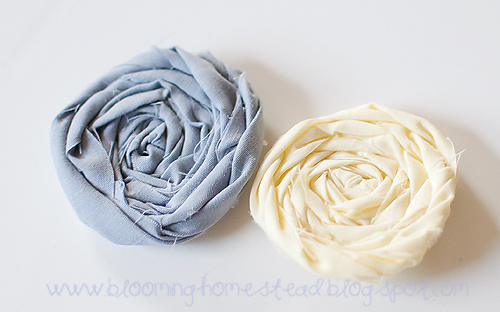
Once you have your rosette finished, wrap the leftover tail piece underneath the rosette and glue it down and trim it. (I trimmed the small end while I was wrapping and twisting and gluing over top of it.
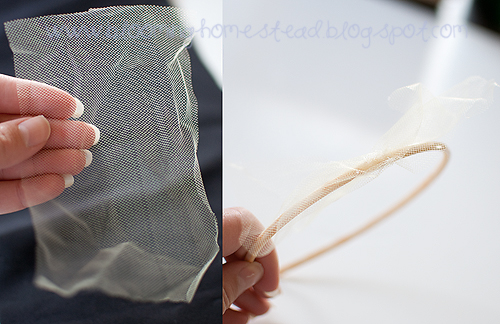
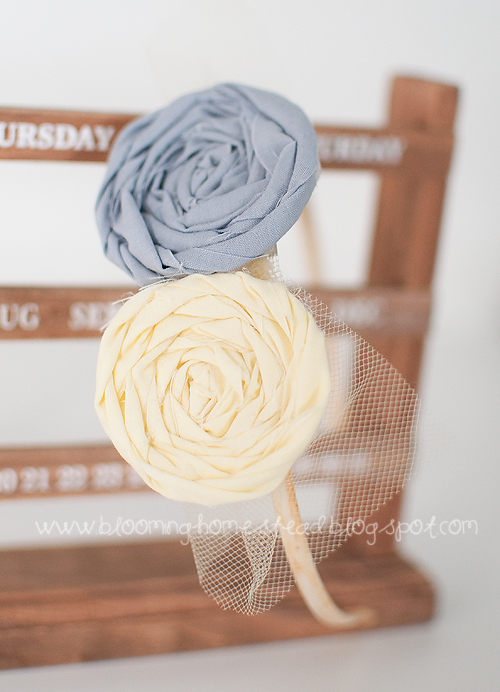
And there you have it. Super easy, fast and not fat! LOL, now want to see the finished product? I just used a cheap plastic headband. (I refuse to use ones that hurt my head or the bands that just slide off...so these plastic ones are the best for comfort for me!) I cut a piece of light yellow tulle and squeezed it in the middle in the shape of a bowtie and glued in on to the headband only on the scrunched part. (Are you following this? I am so not good at explaining...I guess I need to get vlogging!)
Then I glued my gray and yellow rosettes on top.
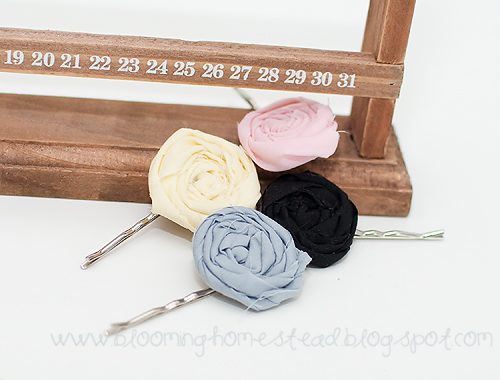
What do you think? Too bad no one is around to take a picture of this on my head so you can see it in all its cute but "subtle not standing high off my head" action. This was so fun and easy that I went a little rosette crazy. I made another one of these headbands but with black rosettes and fishnetting? type stuff...it was pretty but I haven't taken a pic of it yet. And how about these little beauties? I just used some bobby pins with flat circle plates on top that I found at hobby lobby. Perfectly adorable. I fear that if I didn't live in a house overun with boys than everything in my house might be covered with rosettes! LOL, but seriously they are so easy and could be so cute added to wreaths, pillows, frames, bags, shirts...you name it!
Tuesday, April 5, 2011
{Spring-ify}
I wanted to quickly share a few fun spring decor items I am displaying in my home along with my spring printables. I found this piece of wood at the flea market for $.99 and thought I would try my first painted sign.
I sanded it down with my sander and went to town on the edges for some dimension.
I painted it with the same sample of blue paint that I used on my OJ Bottle vase.
Then I printed out the some letters in a font I liked and cut them out by hand and taped them to the painted wood and stenciled with a pencil.
I got a little paintbrush and filled in the letters with flat white interior paint and let it dry for a day. I went back with my sander to roughen it up a bit. My only regret is the oak wood texture, pine would have been better but it still turned out quite cute.
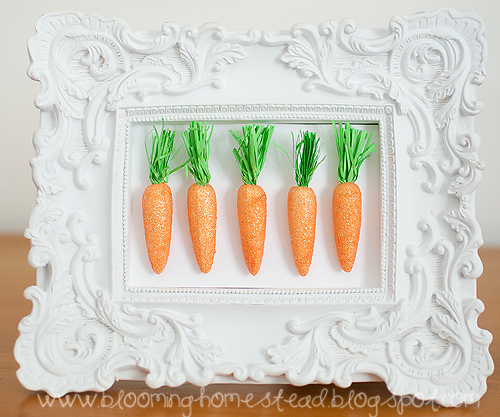
I also updated my frame that I switch out for holidays. I added some carrots I found at Hobby Lobby a few months ago.


